Apache Maven :
Maven is a tool that can be used for building and managing any Java-based project. The central concept of Maven is POM, which is a revolution in itself. POM stands for Project Object Model. Maven is used to build project's, generate reports and documentations from a central piece of information.In this tutorial we will go through a very basic example that covers dependency management using Maven.
Install Maven on Windows:
Follow this link install Maven on windows.
http://maveninstall.blogspot.in/
Maven Coordinates :
Most important thing in Maven are Coordinates. Maven Coordinates uniquely define any Project, dependency or plugin. These coordinates are used in a pom.xml. Below is a snippet of pom.xml that shows coordinates of a maven dependency.
Every coordinate is identified by a unique set of groupId / artifactId / version .
Finding Coordinates :
Not all but almost every library is listed on http://search.maven.org/#browse . This site has a nice search ability.
Build the project :
- Open CLI (Command Line Interface) and type mvn archetype:generate. This will print many numbers. These numbers correspond to certain archetype. Maven provides a default number to choose. Though you are free to type in any number(in the printed range) we will choose default. For choosing default just press ENTER.
- Now choose version of the archetype or just press ENTER to accept default.
- Now enter groupID of your project, say com.mypackage, and press ENTER.
- Now enter artifactId, say helloMaven, and press ENTER
- Accept default version(1.0-SNAPSHOT), press ENTER.
- Accept default packge name or change it if you like, we will accept default which is com.mypackage
- At
this point Maven will show the values of
coordinates(groupID, artifactID, version, package name) and ask
you to verify them. Verify and Press 'Y' . A Build success message is displayed.

By this time Maven did a couple of things for you.
- Firstly Maven created a default project structure (using selected default archetype) for us. This is boiler plate kind of project which will print "Hello World".


- Secondly Maven created a directory under your HOME with name ".m2". This serves as a local repository of dependent Maven artifacts. By default Maven tries first to resolve the dependencies by looking into this repository, if artifact not found then it may look into maven central repository or your hosted repository as per the settings. Default POM generated in our "helloMaven" project contains dependency on junit. Checkout .m2 for this dependency under <HOME>/.m2/repository/junit/junit/3.8.1.
Compile the project.
- Go to project location, i.e. path../to../helloMaven .
- Type mvn compiler:compile. (use command line)
Type mvn help:effective-pom to view effective pom. From this we can confirm that Maven used maven-compiler-plugin (version 2.3.2).


NOTE: Every pom inherits from Super pom and the final pom thus generated is known as effective pom.
Run the project:
- Go to project location, i.e. path../to../helloMaven .
- Type mvn exec:java -Dexec.mainClass="com.mypackage.App" . Follow the following format <package-name>.<main-class-name>. This will run main class in our case "App". On running our main class it prints "Hello World!" on the console.
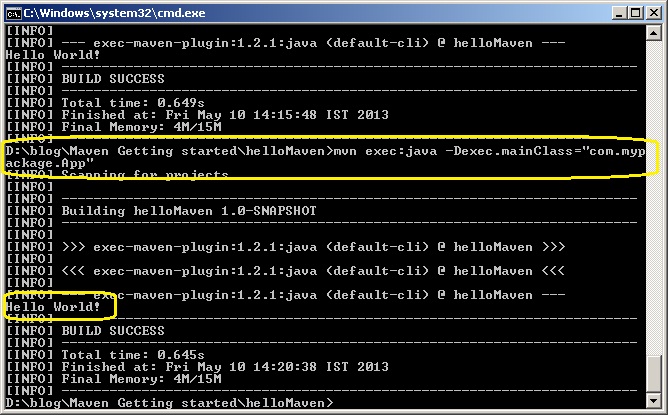
Cheers we have now built, compile and ran our first mavenized project.
No comments:
Post a Comment